Saturday, December 31, 2011

My Version of Ballet Slippers for an American Girl Doll

Santa brought my daughter an American Girl Doll this Christmas.  And of course, along with her came the request for just about all the clothes and accessories in the catalog.  I did offer to buy one outfit, but my naturally frugal nature could not stomach buying anymore than that, especially since I like to sew.  As a result, my project this month has been frantically sewing to dress this expensive addition to our household.  (By the way, I have had a blast doing it!)

One of the outfits she wanted was the ballet outfit- leotard, tutu & slippers. I was able to find a pattern for all but the shoes, so they took a little more thought.  Here is what I was able to come up with.


I traced the dolls foot on stiff interfacing and cut two layers, then cut two of the same shape out of the fabric + 1/4" (one for top & one for the bottom; I did two layers each since the fabric was rather thin). I then cut out the moon shaped piece for the top & the long piece for the heel of the slipper, two each. This is enough for one slipper.


I then sewed 1/4" in on the top & heel pieces, notched the curves & pressed right side out.


I started sewing a piece of 1/8" elastic along the seam of both pieces, stretching the elastic as I sewed.

Gathered with the elastic

I folded & pinned the fabric so the elastic was inside and stitched close to the elastic, stretching the fabric & elastic out flat while I sewed.


Next, I layered the interfacing between the two layers of fabric for the sole of the slipper.  Then I pinned the top (moon shaped) piece on first, with the heel piece going on last, overlapping the ends over the top piece and sewed it all together.   (I serged it because the fabric was unraveling a lot but could have just sewn or zig zagged it.)  


I had to hand sew the ends of the heel pieces to the top so they weren't loose and then I added some ribbon so they laced up like toe slippers.  I have to admit to being rather happy with how they turned out.   (If anyone wants a pattern, I'd be happy to share..)


Sunday, December 11, 2011

Grosgrain Ribbon Flowers & a Festive Pillow

I recently decided to find a use for a roll of burgundy grosgrain ribbon, leftover from a past project, that has just been sitting in my ribbon box without a purpose.  It was a great Christmas color and so I thought I'd try to come up with a way to use it.  The project I initially bought it for only required about 2 feet of the 7 yards, so there was plenty left to create with.  And as luck would have it, I even had some burgundy fabric stashed away that matched exactly.  I bought the fabric for pillows, but had never gotten around to making them.  Perfect!!

I thought flowers would be fun, so after a little research and experimenting, I was able to make two kinds of flowers.  One is a very easy flower to make, but the other did require a little more patience and finger dexterity.

Supplies needed:
Grosgrain ribbon (I used 3/4" wide)
Matching thread & a needle
Beads or buttons for center of flower

Easy Flower
1.  Cut about a 6 inch piece of ribbon for each flower and with the thread and needle, sew a running stitch down the length of the entire ribbon.  (A running stitch is simply sewing up and down, spacing evenly as possible)


2.  Leaving about 1" of thread at the knotted end extending out of the ribbon, pull the other end of  thread tight to gather the ribbon together.


 3.  Tie the two ends of thread together, pulling as tight as possible.  The tighter, the better or your flower will come ungathered. (Is that even a word?  Spell check it telling me it isn't!)  You also might want to stitch the two ends of ribbon together so the raw ends are on what will be the wrong side of the flower.  This will help the flower look more finished.


4.  There is a hole in the center that needs some attention.  I added pearls to cover it up.  You could add other beads or a button, depending on what style you are after.  Not too hard, right?!


Grosgrain Rose
1.  Cut about 4-6" of ribbon, depending on how big & full you want your flower.  Fold the ribbon in half, lengthwise.  Start rolling the ribbon, about 2 times, to make the center of the rose.  Stitch through the entire roll a couple of times to secure it.


2.  Keeping the ribbon folded in half, twist and roll around the center, making sure to stitch often to secure it.  Try to vary the side of ribbon that is on top as you twist.  Sometimes the folded side is up and sometimes the two edges are up.  Try to keep the bottom as flat as possible.  This will take some practice!!  :)  It will get easier to make the rolls look like rose petals, the more you do it.


3.  Keep rolling and twisting and shaping the ribbon.  Stitch through the bottom of the entire rose to keep it together.  Leave about 1/2" or less of ribbon at the end to fold over the bottom of the flower.  Stitch in place.


I sewed both flowers together on the pillow I made of the matching fabric.  They would also make fun hair accessories.  My roll of ribbon made a total of about 30 flowers and roses.


Sunday, December 4, 2011

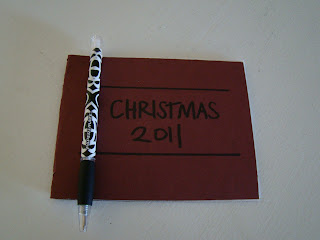
My Christmas Gift Book Idea

It's that time of year when I realize that Christmas is going to be here before I know it and that it is time to get organized.  For the past eight years, I have been using my own creation of a Christmas gift book and while it is extremely simple, it has been a great solution for me to gather all my Christmas information and ideas into one place.  I have often toyed with the idea of creating a "real" one in Excel, but it seems like other things have taken higher priority and that it never gets done.  So I use the same general idea every year, but find I do tweak it a little each time I make it.  All it takes is a half a sheet of cardstock and plain printer paper, both cut the long way.  Fold it in half, staple and with a pen and ruler, I am ready to get organized.  It doesn't take much time at all.


Each person in my family gets one page and I also include one for family gifts as well.  I divide each page into sections that include: budget, gift ideas, what I bought, spent and if it is wrapped.  This year I added stocking stuffers to each page, rather than a separate page for it.  We'll see if that stays for next year.


I also have a page or two for misc gifts, teachers or neighbors, decorating ideas, party plans, etc.


Stick a pen on it and I'm ready to go.  It fits in my purse and I have it ready when I go shopping or to jot down gift ideas when the inspiration hits. With eight years of books on hand, I can go back and see what I have done or given in years past.  It also helps to be able to go back to the year before to see if there are any gift ideas I didn't use that could be used this year.  It is really handy for helping me remember where I've hidden gifts, too. :)   I store them with all of our Christmas books, so I can easily find them the next year. It is interesting to go through them and see how my kids interests have changed over the years.  Part of our Christmas history, I guess.


Some years the books have been "fancier" than others.  Lately they have been just plain, especially since I realized I'm the only one who sees it and do I really care that it is decorated?  Not really.

I realize that this is a rather "old fashioned" idea, with all the electronic options around these days, I'm sure there is some App to download.  But I like that it is tangible and really is a family Christmas journal that helps me to remember those Christmas' past.